Google Home - Install Guide
Photo & description
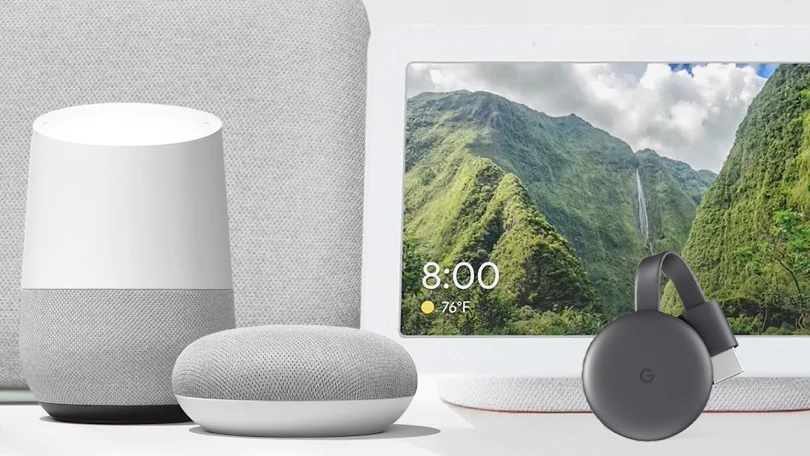
iZone is native to Google Home, so voice controlling your iZone system is simple to set up and use.
Installation
Before you get started
Here are some useful tips to achieve a better iZone / Google Home experience:
- Name the devices, zone names etc. so they are easy to pronounce. If possible, avoid using numbers and symbols in the names
- Try to use Google's jargon. Device / zone names in this guide are highlighted for reference — you'll need to substitute these with the names used on your own system
If using an Android device, it is strongly recommended to set the device's default browser to Chrome.
Link Google Home
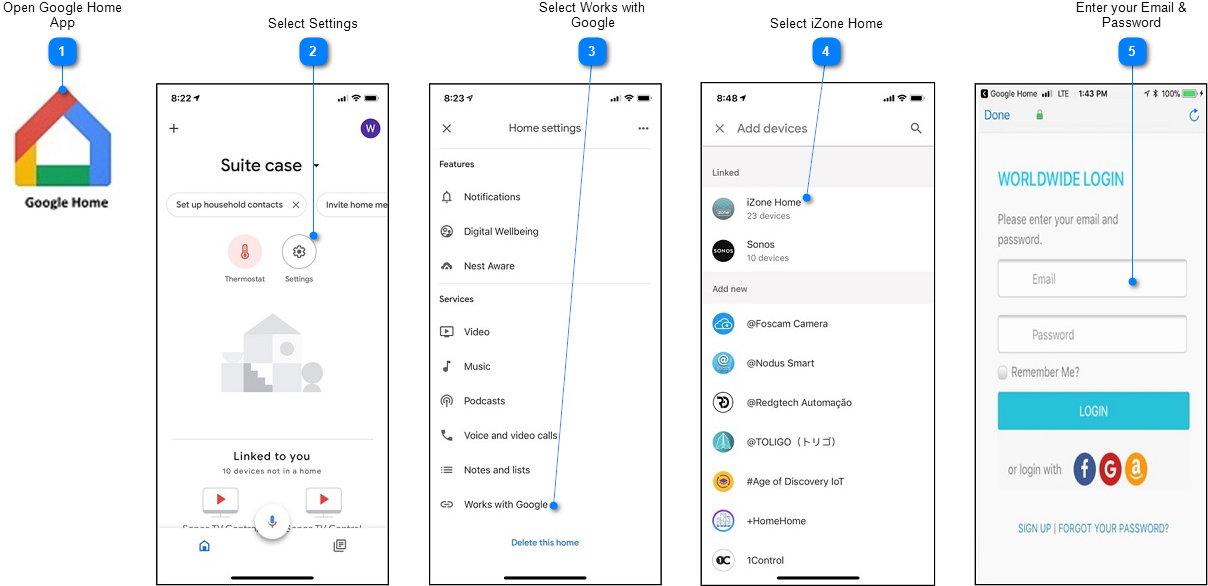
- Open Google Home App
- Select Settings: Press the Settings button to go to the Home settings screen
- Select Works with Google: Press Works with Google
- Select iZone Home: Use the search function and type in iZone Home, or scroll down until you find it
- Enter your Email & Password: You will be taken to the iZone Worldwide login page. Enter the email and password you use for iZone Worldwide access, then press Login
Link Google Assistant
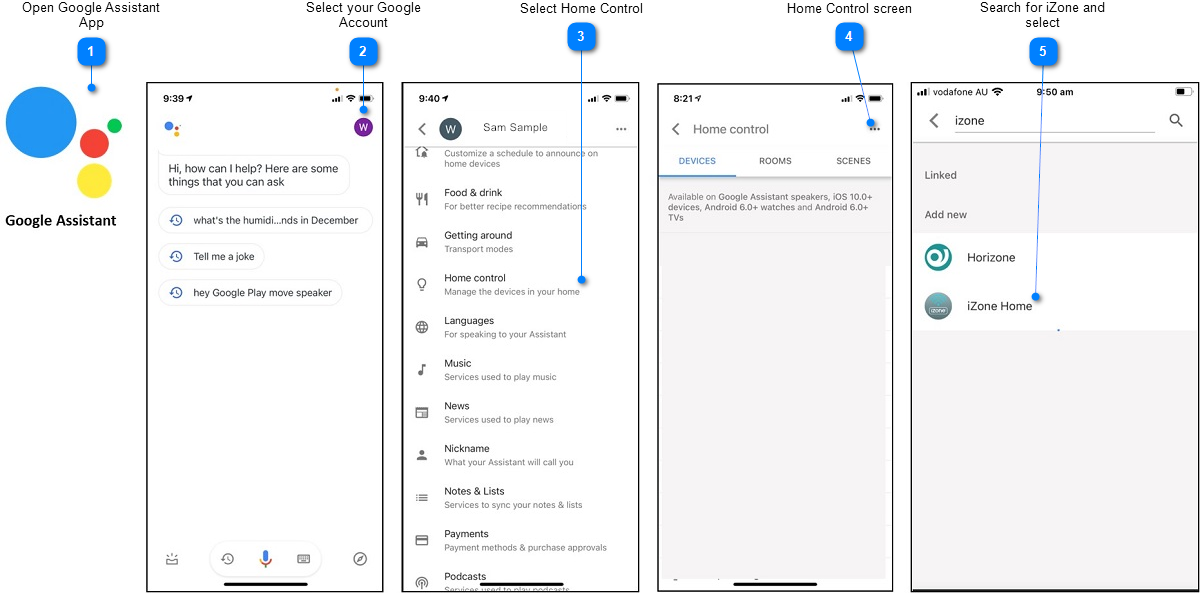
- Open Google Assistant App
- Select your Google Account: Press the icon here to select your account
- Select Home Control: Scroll down to Home control and select
- Home Control Screen: In the Home Control screen, press the three dots (...) in the top right-hand corner
- Search for iZone and Select: Use the search function to find iZone Home and select it
- iZone Worldwide Account: You will be taken to the iZone Worldwide login page. Enter the email and password you use for iZone Worldwide access, then press Login
- iZone Devices will Populate: Your Google Assistant will automatically populate with all your iZone devices. You can assign rooms here