Smart Hub
Part number: COCBH
Overview
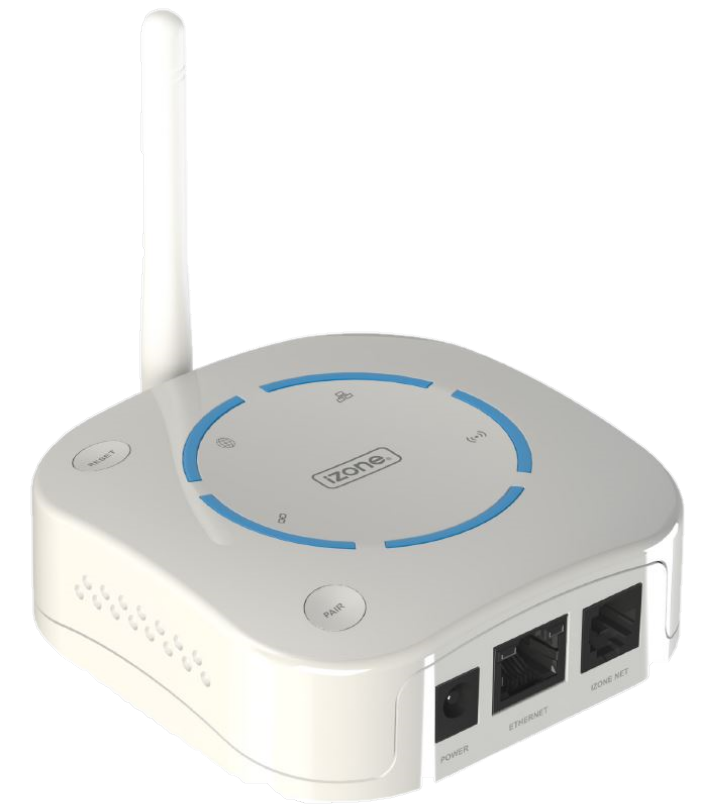
The COCBH Smart Hub is the Wi-Fi gateway for iZone smart home automation devices. It manages 433MHz RF communication between iZone devices and smart mobile devices. A mobile device can communicate with the Smart Hub via a local Wi-Fi communication link or a remote link through the iZone cloud server. Refer to the Smart Hub network for details of the iZone smart home automation ecosystem.
Installation Guides
Wired connection - Ethernet
It is recommended that the Smart Hub be connected to the local network using an Ethernet cable whenever possible.
- A Smart Hub should be installed in the general living area:
- Within 1.5m of a GPO AND
- Within 1m of a Local Network Router or LAN point AND
- Within 10-15m line of site from a CPU Module (C225).
- Connect a CAT5 cable from the ETHERNET port on the Smart Hub to an available LAN port on the network router.
- The Smart Hub supplied in a Nova kit is factory paired to the C225 CPU Module. No additional pairing is required.
Wireless connection - Wi-Fi
The Smart Hub can also be connected to the local network via Wi-Fi. Contact the iZone Support Team for instructions on configuring a Wi-Fi connection.
To register as a new homeowner
Pair a Smart Hub to a AC C225 module
To a pair a Smart Hub to a CPU Module (C225) with no wall controller:
- Ensure both the Smart Hub and C225m module are powered on.
- Press and hold the Pair button on the Smart Hub. The Chain LED 🔗 on the Smart Hub will illuminate.
- While holding the Pair button on the Smart Hub, briefly press and release the Pair button on the C225.
- The Chain LED 🔗 will turn off. Release the Pair button on the Smart Hub.
- The LEDs on the Smart Hub will rotate clockwise for approximately 1-2 minutes.
- Once the LEDs stop rotating, the Snowflake LED ❆ will illuminate, confirming communication between the Smart Hub and C225.
To a pair a Smart Hub to a CPU Module (C225) with a Nexus wall controller (CCTSLW+):
- Plug in the Smart Hub to a power point.
- Press and hold the Pair button on the Smart Hub.
- While holding the button, tap the Pair Icon 🔗 on the Nexus home screen.
- Release the pair button on the Smart Hub once the Chain LED 🔗 flashes rapidly.
- The lights on the hub will now start spinning in a circular pattern.
- Wait for the Snowflake LED ❆ to illuminate, indicating a successful pair.
User Guides
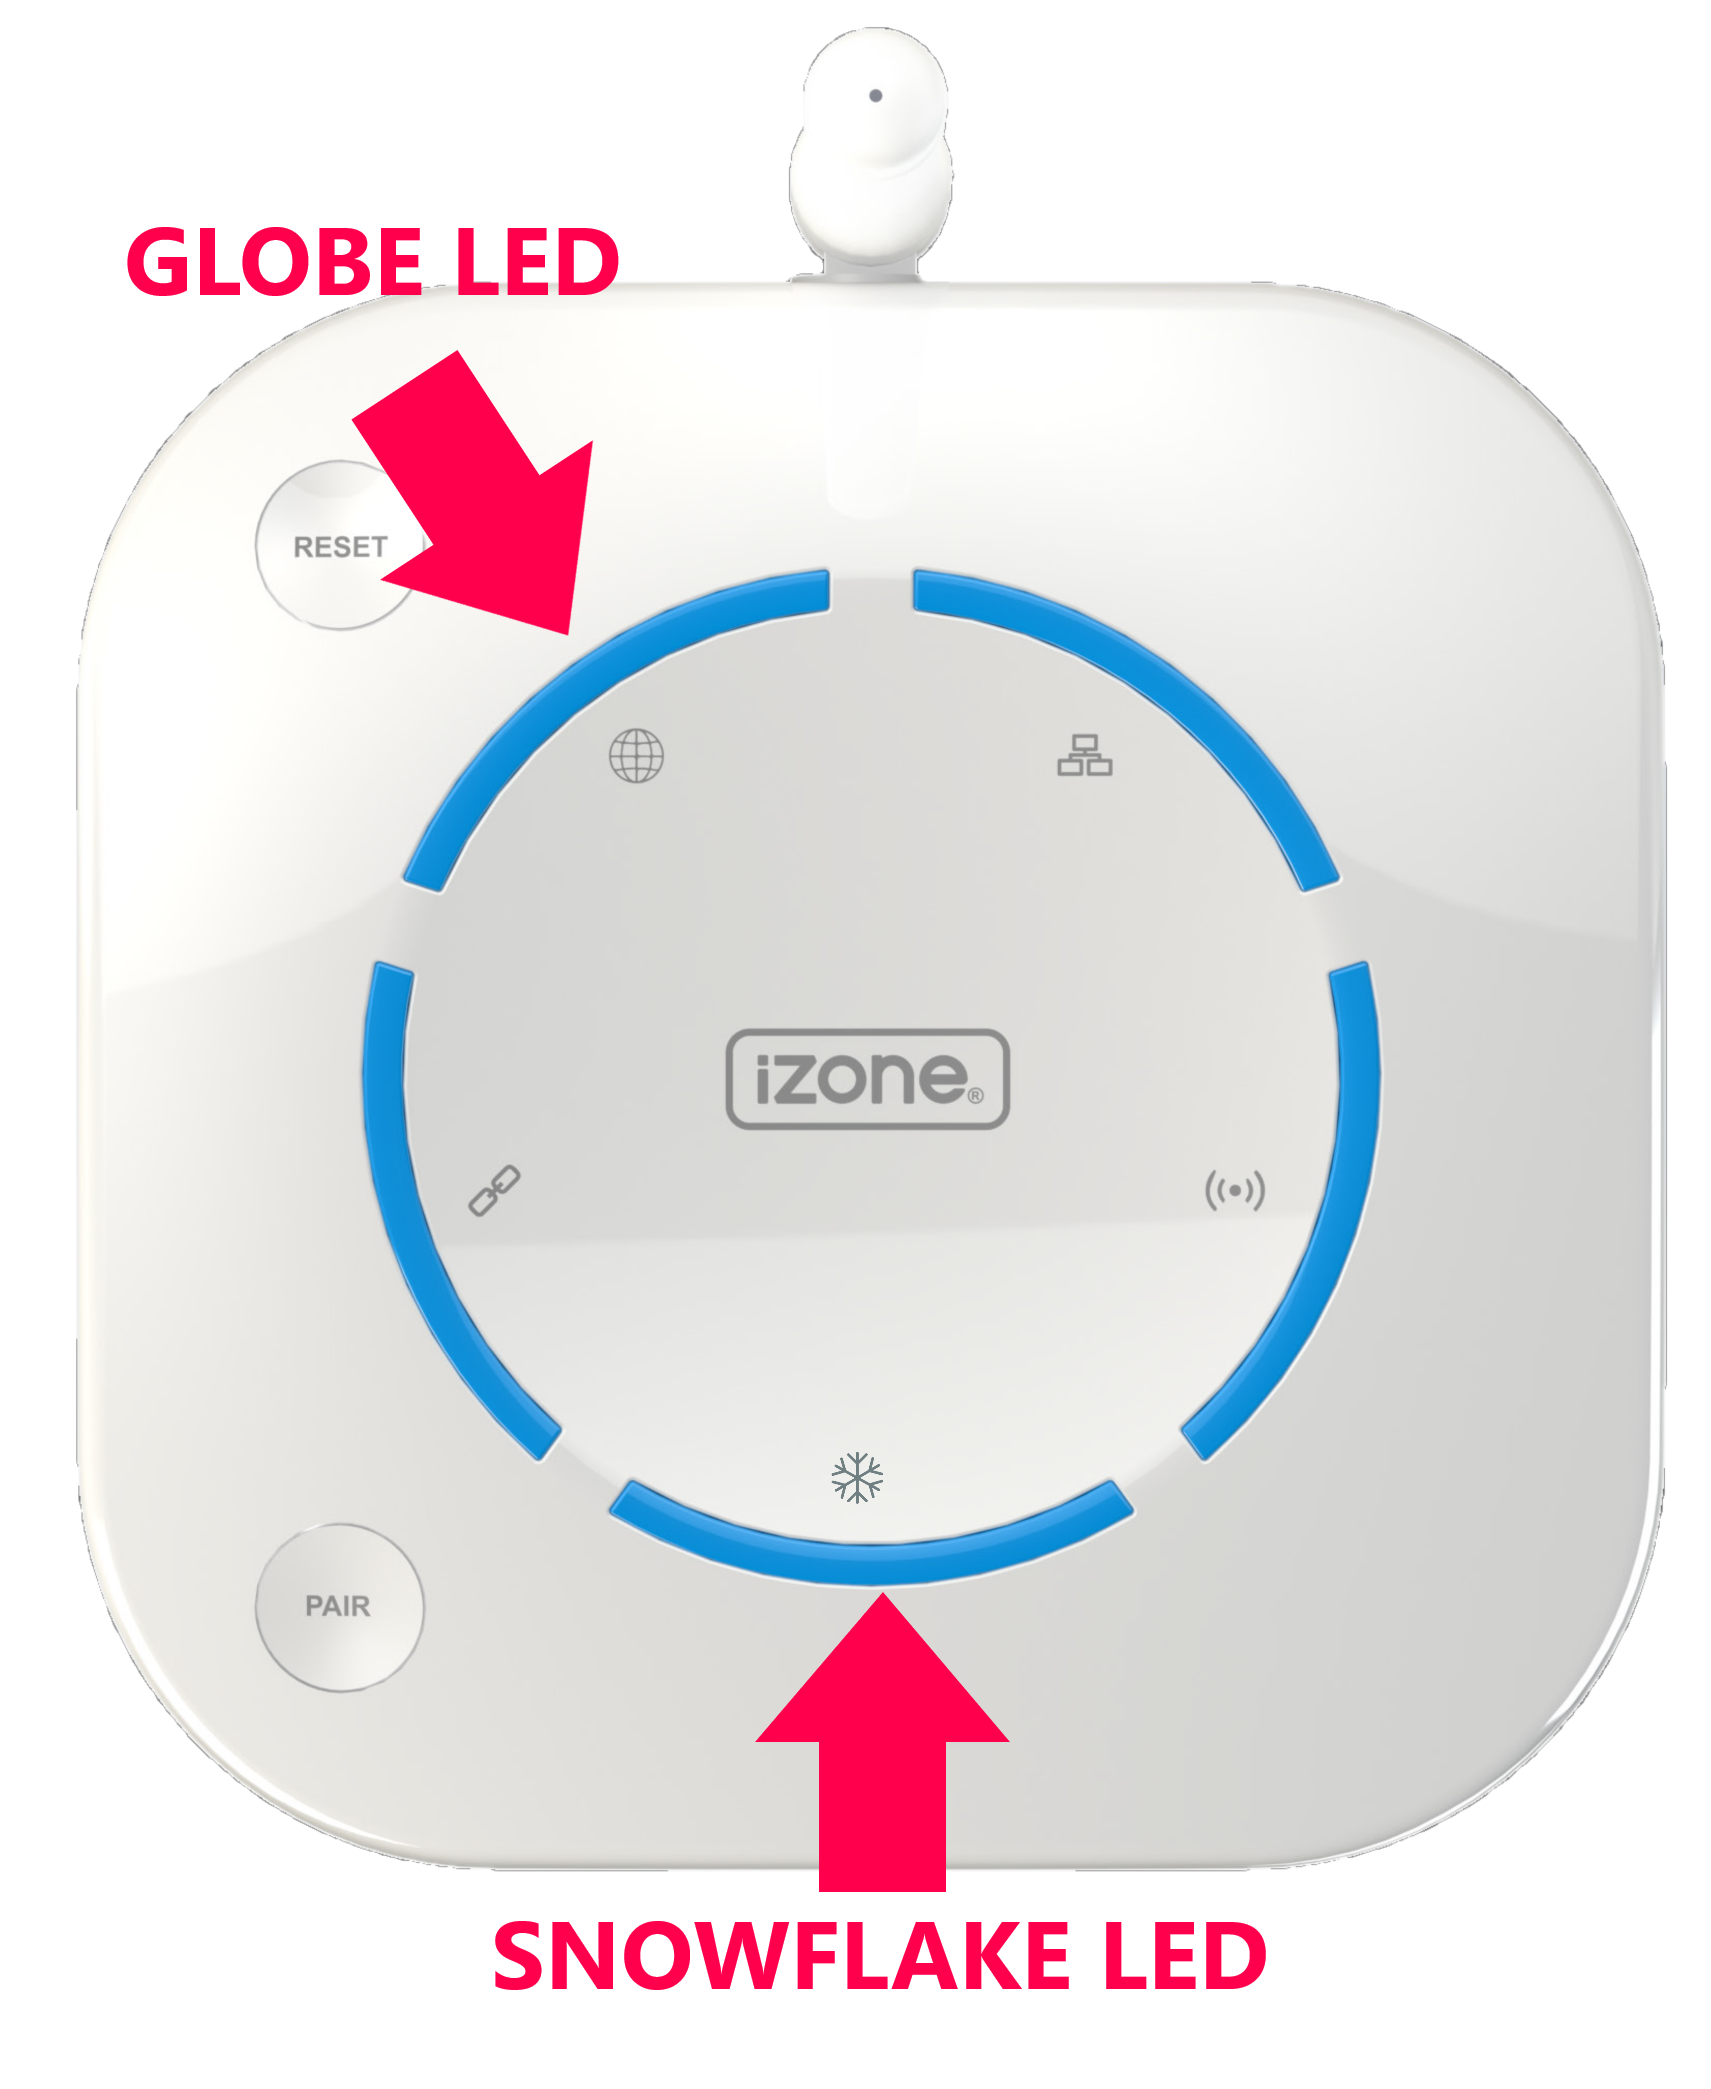
During normal operation, the Globe LED 🌐 and/or Snowflake LED ❆ should be illuminated.
- Globe LED 🌐 - Indicates the Smart Hub is connected to the local network and the iZone cloud server. This allows the Smart Hub to receive commands from the iZone mobile app.
- Snowflake LED ❆ - Indicates the Smart Hub is communicating with the C225 CPU Module. If a C225 is not installed or paired, the Snowflake LED will remain off.
Troubleshooting
- Hub not connecting to internet with Optus and Eero modems
- Smart Hub not powering on, offline, or CPU Not Detected
Specifications
| Specification | Description |
|---|---|
| Power supply | Input: 240VAC ~0.3A Output: 5V 1A |
| Casing material | Fire retardant ABS plastic |
| Operating temperature | Up to 45⁰C |
| Communications | Wired CAN Bus Wireless 433Mhz (iZone proprietary protocol) |
| Cable included | CFC1S (CAT5E) |
| Dimensions | 35H (without antenna) x 95W x 95L mm |
| Weight | 126g (excludes power supply) |
Firmware and Updates
COCBH 4.41 - Sep 2026
- Enable local mDNS discovery
- Integrate with CoolLinkBridge by adding JSON V1 support
- Fix remote control issue so all home automation devices can be controlled remotely
- Fix setpoint and minimum/maximum airflow commands
- Allow scenes to be activated remotely
- Add the ability to retrieve RF load information from C225
COCBH 4.39 - Aug 2026
- Repeat temperature sensor readings via RF network
- Lengthen pairing confirmation LED flashing
- Add time to SystemV2 JSON
- Add Navi support
- Fix Universal Module bug
- Allow zones to unchanged when setting up favourites
- Added related support for receiving the 4th letter from AC unit error code
COCBH 4.36 - Jan 2026
- Changed internal structures to use a common library structure
- Added TCL ducted AC integration (IRD-211)
- Fixed Brivis reset command and quick on/off issue (IRD-854)
- Turn on AC on when activating a zone.
- Added zone grouping to combine multiple zones under one name, making it easier to manage large areas
- Added ability to change Daikin field setting via Nova user interface:
- Fan behaviour when setpoint is reached in cool and heat mode
- Adjust static pressure
- Improve command structures to make setup wizard run quicker
COCBH 4.31 - Sep 2025
- Brivis Configuration JSON: Full parameters available in AC Config, Manufacturer section.
- Standalone Sensor Monitor: Pair CRFS2, CRFS2H, or CRFS directly without zones.
- AC Setpoint in Full Schedule: Schedule commands now include dynamic set point changes.
- Over the air updates (OTA): Implement the ability to upgrade firmware version remotely without replacing physical hardware (requires Rev B hardware or higher)
COCB 4.29 - Dec 2024
- Added temperature control in constant zone
- Added JSON command to set all favourite/schedule settings
- Enabled setting of Mitsi Electric 4th fan speed
- Fixed Optus modem not receiving comms
COCB 4.28 - Nov 2024
- Various updates and optimizations
COCB 4.27 - Jul 2024
- Fix weather temperature data types for negative temperatures
- Fix C225 config version for old firmware in C225
- Added the ability to pair a COCB to a C225 in JSON API
- Add flag to indicate comms to AC unit
- Added bridge repair equivalent option
- Reset bridge after changes to DHCP and WiFi settings
- Add TCP socket monitor. Reset socket when timeout occurs.
- Better handle old firmware in C225
- Sleep timer countdown
- Flash LED's when changing WiFi settings and DHCP setting
COCB 4.26 - Jun 2024
- Hot water system release (IRD-189)
- Do not allow sending info to C225 and requesting info from C225 at the same time
- Fix Apple home reconnection
Hardware Revisions
| Revision | Description |
|---|---|
| Rev A | Initial release with hardware code 2F5 |
| Rev B | MCU 4F5 to support over the air (OTA) updates |