Navi Setup Guide
There are several ways to set up and configure the Navi control system. Refer to the AC Unit Control Sensors documentation for detailed information on each sensor type. For guidance on operating the wall controller, see the Navi User Guide. The Navi wall controller forms part of the Navi Zone Control Kit (C265K).
From the Navi home screen, tap on the Settings cog in the top right hand corner of the page to access the settings menu.
Basic settings
Refer to the Navi User Guide
AC settings
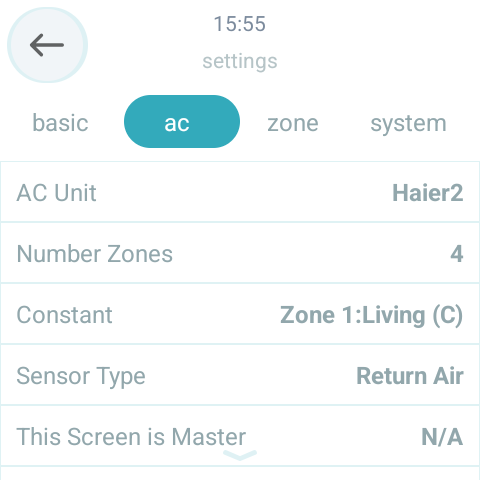
Sensor type: Return Air
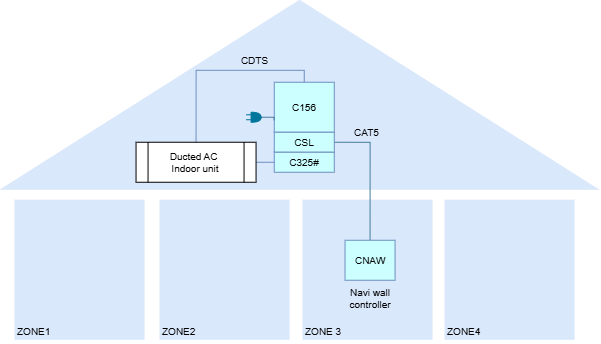
The Return Air option uses the return air sensor built into the AC unit. This is the factory default sensor type for the iZone system. Because it relies on a single sensing point, it provides an approximate average temperature across all zones. As a result, the AC unit operates independently of individual zone temperatures and may cycle off before or after certain zones reach their set points.
From the Home screen, select the Settings cog in the top right corner. Open the AC tab and tap the value of the setting you want to change. Enter your installer code when prompted. If you don't have an installer code, register as an installer or use the default installer code 926383.
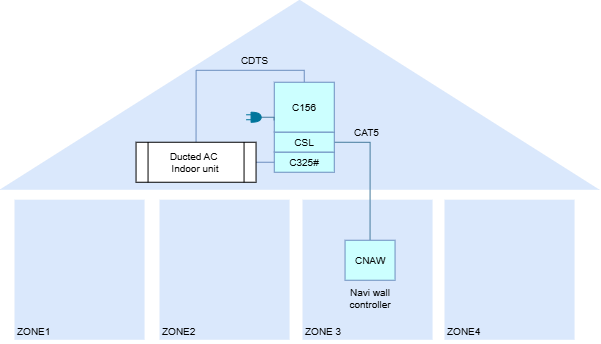
- AC Unit: Automatically detects the AC brand when the C325# module is connected. AC unit error code will show here if triggered. A filter warning will also show here when triggered.
- Number of Zones: Select between 0-8 zones.
- Constant:
- Choose No Constant when a fixed constant has been installed (no zone damper) OR
- Otherwise, select the zone you want to nominate as the constant.
- Sensor Type: Return Air
- This Screen is Master: N/A
Sensor type: Master
When Master is selected, the AC unit is controlled using the set point and actual temperature measured by the chosen Navi wall controller (the master sensor). If multiple Navi controllers are installed, the user can select which screen serves as the master controller. The master sensor's actual temperature is a hysteresis smoothed value that gradually converges to the true room temperature. This smoothing process filters out short term spikes and troughs, so the displayed temperature changes more steadily over time. While operating in Master mode, the AC unit's temperature display updates in 0.5°C increments and typically maintains control within an approximate range of ±1°C, depending on the AC unit brand.
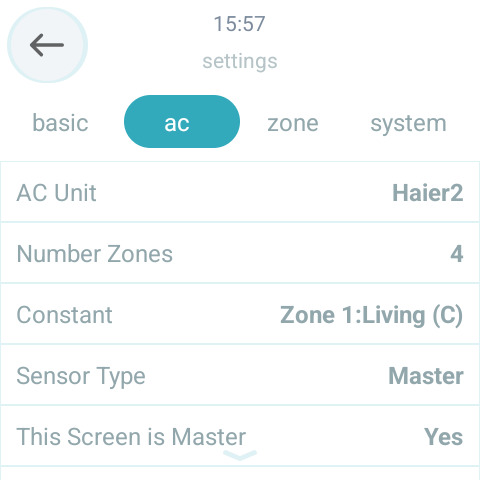
From the Home screen, select the Settings cog in the top right corner. Open the AC tab and tap the value of the setting you want to change. Enter your installer code when prompted. If you don't have an installer code, register as an installer or use the default installer code 926383.
- AC Unit: Automatically detects the AC brand when the C325# module is connected. AC unit error code will show here if triggered. A filter warning will also show here when triggered.
- Number of Zones: Select between 0-8 zones.
- Constant:
- Choose No Constant when a fixed constant has been installed (no zone damper) OR
- Otherwise, select the zone you want to nominate as the constant.
- Sensor Type: Master
- This Screen is Master: Select Yes on the Navi wall controller that must serve as the master sensor.
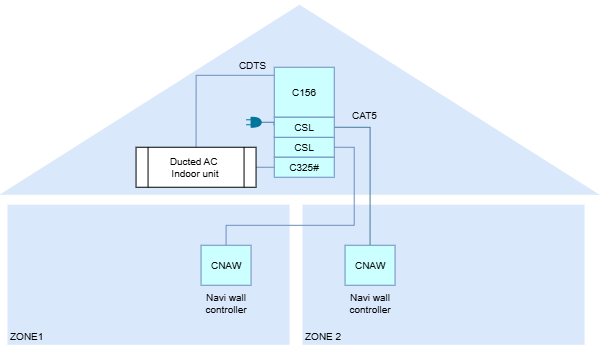
Sensor type: Zones
When Zones is selected, the iZone system scans all configured zone sensors and uses the sensor that is furthest from its set point to control the AC unit. As zones move closer to their set points, the controlling sensor may shift between them until the final zone reaches its set point. It is not possible to pair Wireless Temperature Sensors (CRFSW) with the Navi zone controlling system. However, a Navi wall controller can be installed in each zone to serve as that zone's temperature sensor.
From the Home screen, select the Settings cog in the top right corner. Open the AC tab and tap the value of the setting you want to change. Enter your installer code when prompted. If you don't have an installer code, register as an installer or use the default installer code 926383.
- AC Unit: Automatically detects the AC brand when the C325# module is connected. AC unit error code will show here if triggered. A filter warning will also show here when triggered.
- Number of Zones: Select between 0-8 zones.
- Constant:
- Choose No Constant when a fixed constant has been installed (no zone damper) OR
- Otherwise, select the zone you want to nominate as the constant.
- Sensor Type: Zones
- This Screen is Master: N/A
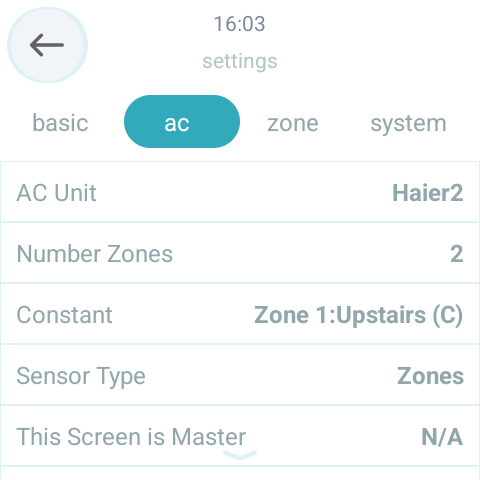
The next step is to link each Navi controller to a zone. For the first zone, go to the Navi wall controller installed in that zone. From the Home screen, select the Settings cog in the top right corner. Open the Zone tab and tap on No Screen next to the first zone. This will change the sensor from No Screen to This Screen. Tap This Screen again to change the setting back to No Screen.
Repeat this process for each subsequent zone.
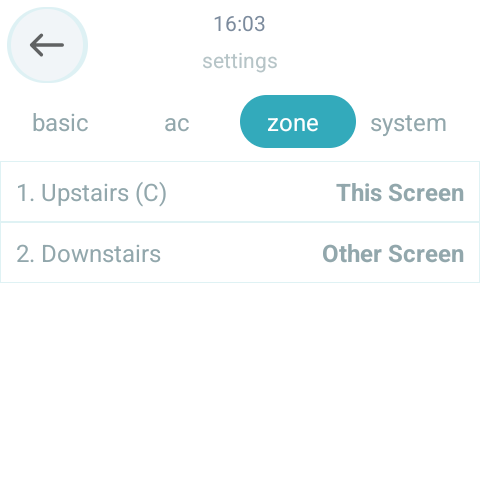
Zone settings
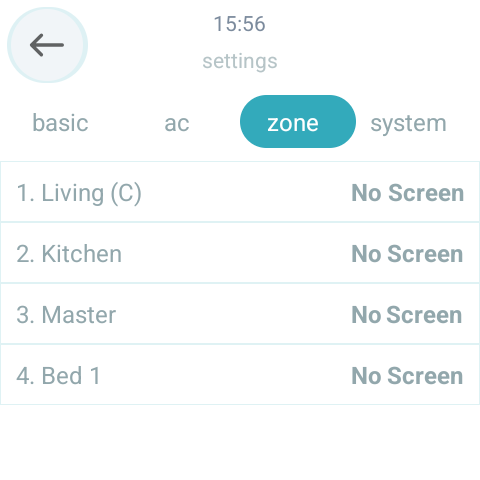
Tap on a zone name to choose a name from the predefined list or customise zone names using the mobile app if you prefer manual editing. The sensor options only applicable when Zone sensor type has been selected as per the previous paragraph.
System settings
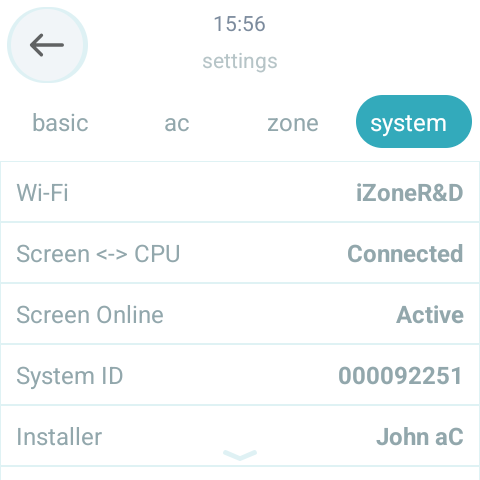
- Wi-Fi: Connect the Navi controller to your local Wi-Fi network.
- Screen - CPU: Displays the communication status between the various iZone modules installed in the home. Tap on the status to reset the Lite CPU module (C156)
- Screen Online: Indicates whether the Navi controller is connected to the iZone Cloud server and can be controlled from a mobile device. Tap this option to disable remote/mobile control. When multiple Navi controllers are installed in a single home, only one can have Screen Online enabled. It is recommended to enable this on the controller with the strongest Wi-Fi reception.
- System ID: The unique system number used for remote mobile control only appears when the controller is connected to WiFi.
- Installer: Tap on value to enter your unique 6 digit installer code. If you don't have an installer code, register as an installer. This will ensure that your system is available on Zonewatch.
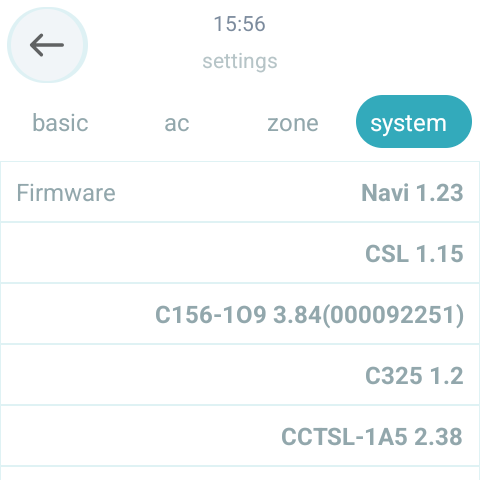
- Firmware: Software version numbers for the various control modules installed in the home. Tap Navi x.xx to update the Navi wall controller firmware. Tap CSL y.yy to update the Sceen Link Module's (CSL) firmware.
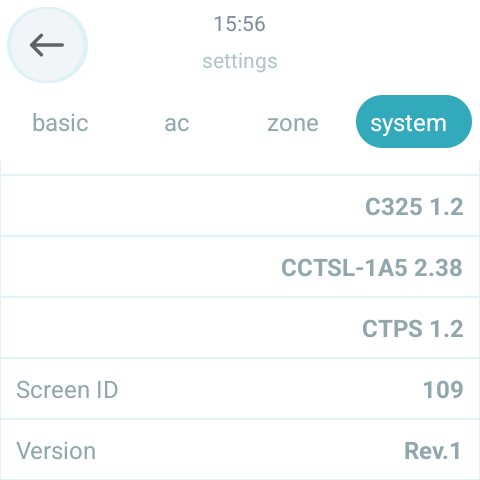
- Screen ID: The unique ID of the Navi controller, used for support purposes.
- Remote support: Toggle to enable remote support for 7 days
- Version: The software version number of the Navi operating system.